


Should I install my manufactured stone or stone veneer myself?
Manufactured stone veneer – do it yourself or hire a professional?
When consumers determine that it is time to update their home’s façade, they may or may not have the skills and knowledge required to install the wall stone themselves. One rule of thumb when determining whether to tackle a project yourself, or trust it to a professional, is to evaluate whether the project will be more costly if you do it incorrectly and then have to call in a professional to fix or re-do the job. If you are not comfortable doing it yourself, considering a professional is good advice. It could save you both time and money in the end.

Installing Wall Stone Veneer
If you wish to install your wall stone yourself, there are two important things you should take into consideration
If you are going to “do-it-yourself” you should know the applicable local building code and what stone veneer steps are required to install a wall.
Building codes
Building codes vary from area to area. It is important to know them not only to ensure compliance, but also to be certain that the job is done correctly. For example, the absence manufactured stone sealer or incorrect installation of water proofing may result in water infiltration and cause damage in later years.
Stone Veneer Steps for installation
The following Broad Steps are required to install manufactured stone
Preparing the Surface
Natural stone veneer can be mortared directly to concrete (poured or block wall) or brick, on interior or exterior surfaces. Concrete that is painted or coated must be cleaned using sand or water blast. If unable to thoroughly clean the surface, a metal lath will need to be adhered and a scratch coat of mortar applied.
On wood or metal frame surfaces where there is a temperature difference, you need to prepare the surface by taking additional stone veneer installation steps.
**Building Code requirements vary from area to area. Check with your local authorities or installation professional for building code requirements.
Layout of Stones
Before applying the natural stone veneer, it is best to layout some of the stone distributing stones of varying colour, shape and size to design your pattern.
Mixing Mortar
Use type S or Pre-Blended Veneer Mortar Mix
Follow the manufacturer’s specifications for mixing and coverage.
Scratch Coat Application
Apply a scratch coat of 3/8” to ½” thick mortar to the metal lath.
Applying the Stone
Install corner stone pieces first starting at the bottom and working up. Apply an even ½” thick layer of mortar to the back of the stone. Because each stone may be a different thickness, you need to adjust the amount of mortar applied to the back of each piece.
Press the stone firmly into place until the mortar behind the stone squeezes out on all sides. Wiggle the stone as you press to insure a firm bond.
**This step is very important when applying mortar to jointless stones.
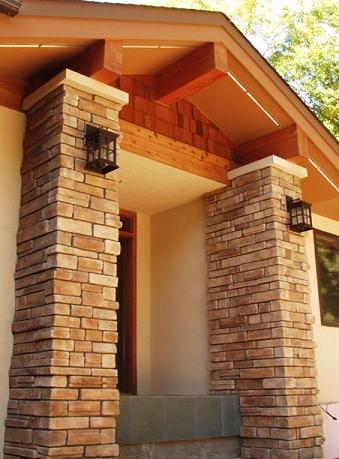
Stone Columns Entry Way
Grouting the joints
Wait for the mortar to firm in the joints then rake out the excess using a wood or metal strike tool.
Seal all joint edges by applying pressure on the mortar, causing mortar to move into the joints.
Brushing and cleaning the area
When the mortar becomes crumbly, use a dry bristle brush or small whisk broom to clean any spots of mortar left off the stones face.
You will also need to brush joints to remove any loose mortar.
NOTE: Loose mortar spots should not be allowed to dry overnight.
A manufactured stone sealer may be applied to enhance the colour and protect the stone from penetrating stains. Be sure to test the manufactured stone sealer on a small area to make sure you will like the results.
Canyon Stone Canada Inc carries a variety of manufactured wall stone that can be grouted or dry stacked, in a variety of remarkable colours, for either exterior or interior wall applications. Visit one of our dealer showrooms and ask about their exterior stone products and installation services. For a free catalogue, or to locate a Canadian dealer near you, contact us
